Tuesday, July 27, 2010

Help!!!! - "Ear Lobes" Biscuit??


You dip the "ear lobe" biscuit into black coffee. Scoop up some coffee along the way. Just because it can. You then transfer the "ear lobe" biscuit (without dropping any coffee) into your mouth and hmmmmm, crunch crunch, yum yum.....delicious.

Wait a minute!! "Ear Lobe" biscuit??!!! Oh man!! What a terrible name!! The truth is I have no idea what is the name of this biscuit. I just know that I grew up buying this biscuit whenever I see it sold anywhere in Malaysia. I think they are mostly homemade as they are usually sold in a transparent bag with no details. At least the ones I buy and they are usually really good and crunchy.


Now, if any of you know what this biscuit is called, please do let me know. So, calling out to Malaysians and Singaporeans whom I think would be familiar with this biscuit, tell me what is the name. If any other country has this biscuit, do share too.

The reason it is called ear lobes is because it is shaped somewhat like an ear lobe. You think?


With my relocation to Dallas 2 month plus ago, I managed to bring along one pack of "ear lobes" biscuits in my already overly full luggage. I savoured every bite and manage to take some photos before it all went into my tummy.

So help me out.

Do let me know what this biscuit is called and best if there is a recipe somewhere out there on how to make this.


Friday, July 23, 2010

"Ho Chak" Fried chicken with a special condiment twist


I remember watching a popular local cook show in Malaysia called Ho Chak. It is a 30 minute weekly show whereby the 2 young hosts would go around and introducing the delicious food in Malaysia. "Ho Chak" means good food in Hokkien (a Chinese dialect) and the show is extremely popular. Who doesn't like to watch a show on good food, though it would be much better eating it right?


In one of the episodes, they introduced a new segment at the end of the show whereby the 2 hosts would cook one recipe. This was quite a new twist to the show as the audience are so used to seeing the 2 host going around only eating. It was refreshing to see the 2 amateur hosts now attempt to cook.

I was pleasantly surprised by what they came up with as it was simple yet interesting. Infact I remember it till now. So I would say they made quite an impression as I actually made th dish myself the first opportunity I had after watching the show.

It was a simple fried chicken with a little twist on the condiments.

Simple ingredients :
1. 2 whole leg of chicken - light marinade of salt, pepper, light soy sauce and corn starch.
2. 5-6 cloves of garlic - chopped fine
3. 1 TBSP large red chilli - chopped fine
4. 1 cup of scallion - chopped
5. 1/2 cup Ginger chopped fine
6. Oil for frying

Simple Steps :
1. In a pan of hot oil, deep fry the whole leg of chicken. There is no flour or bread coating for the fried chicken. Just plain fried chicken with no think coatings. Deep fry till the chicken if cooked and golden brown. Remove the chicken and set aside.


2. In a new pan, with 2 TBSP of oil, put in the chopped garlic, ginger and saute till fragrant. Add the red chillies and scallions. Add a pinch of salt with 2 dash of sesame oil. Scoop up and put on top of the fried chicken as garnishing.


2 simple steps but this adds a new taste to the plain fried chicken.

Monday, July 19, 2010

Kaya Kok (Kaya Puff)


I was itching to bake something. I was out of yeast so I can't bake bread. I did not have cake flour to make cakes. I only had a pack of all purpose flour and I was cracking my head on what I could bake.

I went through the recipes I learned during my 2 month MIB baking course and sure enough I found the perfect recipe. Kaya Kok (Kaya Puff). Perfect! I made Kaya which is coconut jam and if you read my previous post (click HERE), I was not exactly thrilled with the colour and texture of how it turned out. It taste great but just wished I could get the rich dark brown colour the way my Aunt Judy makes it. Anyway, making kaya kok was simply perfect timing. I had all the ingredients required and yes I could cure my itch to bake.

What is Kaya Kok? It is simply a puff with coconut jam filling.


Simple ingredients :
1. Kaya - For the recipe please click HERE.

Dough ingredients A - Outer Dough
1. 150gm All Purpose Flour
2. 60gm margarine / butter
3. 30gm sugar
4. 55gm water

Dough ingredients B - Flaky Dough
1. 90gm All Purpose Flour
2. 50gm Shortening

Simple steps :
1. Dough. I am making flaky kaya Kok so this requires 2 doughs the outer and flaky dough. For each dough, mix the ingredients and knead them gradually till it forms a dough. Since this is a small portion, best to just use your hands. Let the 2 doughs sit for 5 - 10 mins.

Flatten the outer dough slighty (with the middle being thicker). Wrap the flaky dough into the outer dough. Make sure the dough close properly into a ball like shape and roll it around to form a smooth ball.


2. Roll the dough out into Vertical rectangular. Fold to 3 like picuture below. Let it rest for 10 minutes.


3. Turn 90an with a roller, roll out vertically into a thin sheet rectangular shape. From the top, fold downward like a Swiss roll shape.


4. With a knife, divide the dough into 10pcs (abt 2 cm width). Then witha roller, roll it out to a longish circular shape. You will see the beautiful swirls patterns on the dough. This will look beautiful when baked.


5. Fill kaya fillings in the centre of the rolled out dough. Seal together. Pleat the dough by pressing the edge with the thumb and first finger (similar to curry puff pleating).


6. Egg wash before transfer to oven. Bake at 350 for 30 mins. Remove from oven to egg wash again after 15 mins. Put back into oven for another 15 mins.


Hmmm... I am really happy with how the kaya kok turned out. The pastry smells really good as I used butter vs margarine and combined with the sweetness of kaya...this is a yummylicious snack for breakfast, tea-time or even supper. :)


Oh yeah!! I am craving for a little self fulfilling attention. Please like me on Facebook.

Thursday, July 15, 2010

Kaya ("Rich" Coconut Jam)


Trivia Question : Why is butter poor?

Answer : Cos it is not Kaya!!


Someone left this comment on my homemade kaya blog post in my old food blog. I thot it was it was really funny.

'Kaya' is a Malay word that means Rich! But in Malaysian food context....it is the name for coconut egg jam.

Anyway serikaya (called in Indonesia) or simply just 'kaya' (in Malaysia) is made from 2 main ingredients coconut milk and eggs. I have made this several times but I must say I am still not able to perfect the recipe. Don't get me wrong, the taste is good but I just can't get the dark brown color and the ultra smooth texture like my Aunt Judy's kaya. My Aunt Judy has perfected making of kaya. Her kaya is brown and smooth and is absolutely delicious.


Most of the kaya sold outside greenish (pandan leaf flavoring and color) and also some yellowish brown - like how mine turned out. But I love the dark, really dark brownish ones.

I will try again and again until I get it to the right color I am looking for. Here is how I made it, let me know if there anything you can think of for me to improve.

Simple ingredients :
1) 4 eggs
2) Sugar - 200gm
3) 1 coconut from can - 350ml or 400ml
4) Pandan (screwpine) leaves

Simple steps:-
1. In a big bowl, add half of the sugar and eggs together, beat till well blended till sugar is dissolved. I sieve the coconut milk first to ensure there are no clumps. I hope that this process will give my kaya a smoother texture. Add coconut milk with the eggs and sugar and beat lightly for it to be well mixed together.


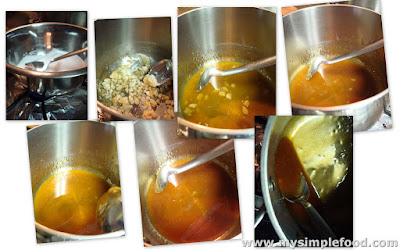
2. For kaya to turn brown vs the greenish kaya, we will have to caramelized some sugar. Therefore take the remaining sugar in an aluminum pot and put it direct in mid to low fire. Keep stirring with spoon. The sugar will start to caramelized to a nice brown colour. Continue to stir until all sugar liquidate to a nice brown texture.


3. Once the sugar is caramelized, add in eggs and coconut mixture. Stir for the mixture to mix. We now need to use the double boil concept where you put the pot of kaya mixture in bigger pot of water. Your pot of mixture should not be on the direct heat.


4. Now, all you do it to stir the mixture in continuous slow motion. Ensure medium to low heat. Add in the pandan leaves (tied in knot) into mixture and continue to stir. I did not add any as I did not get to buy them at the Chinese Grocery store.

5. Continuously stir for 2 hours until the mixture start to brown and thicken.

Pic : My kaya is brown but still not dark enough and not as smooth as I like it to be. Any advice?

6. The kaya should be ready. Remove the pandan leaves if you have them inside. Leave it to cool down. Store them into jam containers. Put in the fridge if not in use. Meanwhile, get the toast ready.


Kaya goes best with toast. Once bread is toasted, add butter and kaya on bread and trust ...it is yummylicious! Butter is rich but I guess kaya is "richer" literally. :)


Monday, July 12, 2010

Tandoori Chicken Fast and Simple


Tandoori chicken is a highly popular Indian dish made of yogurt and Indian spices. It is traditionally cooked at high temperatures in a tandoor (clay oven), and it is still prepared that way in most restaurants in Malaysia. However, it can also be prepared on a traditional grill or for me who does not have a grill yet, I just baked it in the oven.

While in Malaysia, I hardly cooked. Firstly my mom is the cook at home and I avoid being in the kitchen with her cos when I am there I just want it my way. And yeah...mom wants it her way too. So, too many cooks spoils the broth...absolutely.

The other reason, I don't cook as much in Malaysia is that food is just everywhere. People are just eating out all the time and the varieties are amazing. Malaysia has 3 major races - Malay, Chinese and Indian and if you add all other food influences, we are definitely a melting pot of food...literally! If I want tandoori chicken I will just go to a nearby Indian Muslim restaurant (mamak) and there I will have a lovely tandoori chicken freshly prepared for me.


Now, I don't have the luxury of going out and just take out "authentic" Asian food in USA, so when I found a packet of tandoori spices in my kitchen, I was thrilled with the opportunity to make tandoori chicken the fast and simple way.

The tandoori spices are a complex mix of spice with garlic, ginger, cumin, cayenne pepper, coriander, ground cardamon, cloves, black pepper and even turmeric. But for the simple way, just get a ready made tandoori spice pack. And I only the needed the chicken and yogurt.


Simple ingredients :
1. A packet of Tandoori Spices. I used Nestle's Chicken Tandoori Mix.
2. About 1 lb of chicken. I used 3-4 chicken drumstick and 3-4 chicken tenders.
3. 1 Plain yogurt (6oz)
4. One lime - sliced for garnishing
5. One whole onion

Simple steps :
1. Mix tandoori spices with yogurt till well blended. Marinade with chicken for 1 hour.


2. You grill this but since I do not have a grill yet I made a grill out of my oven. To make handling of the chicken easier, I used bamboo skewers on the chicken before transporting it to the oven.


3. Bake at 350F for 30 - 45 minutes.


4. Garnish with Lime and onions. Squeeze lime on chicken before serving for the extra tangy taste.


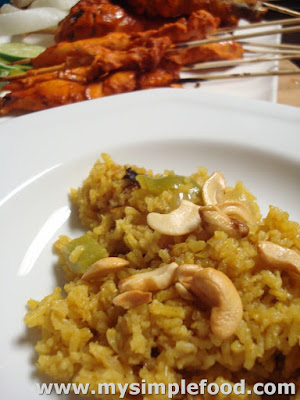
To make a complete Malaysian style Tandoori meal, I made Nasi Briyani (rice with spices) to accompany my delicious tandoori chicken. Oh yeah, the briyani mix was from a ready made packet too. Now, that's what I call a fast and simple meal :)


Tuesday, July 6, 2010

Ginger Scallion Noodles adapted from Momofuku


After I made the ginger scallion sauce, I was thinking what I would do with it? The closest sauce I had eaten to this sauce is the shredded ginger condiment usually served with steamed chicken in Malaysia. And honestly, I could not really visualise Momofuku's delicious Ginger Scallion "Noodles".

I was a skeptic. I did not believe that the ginger scallion sauce would taste good on noodles. But I was not going to steam a whole chicken just to go with that sauce, way too much trouble. So, I took a leap of faith and decided to go the Momofuku way. Ginger Scallion Noodles.


Simple ingredients
1. Ginger Scallion sauce. Click HERE for my last posting on the recipe.
2. 2 dry egg noodles or you can use Japanese udon noodles
3. Pot of water
4. 1 whole cucumber
5. 1 tsp sugar
6. 1 tsp salt

Simple Steps :

1. Pickled cucumber (this is served as a side dish with the noodles) - slice cucumber as thin as possible and placed in a big bowl. Add 1 tsp sugar and 1 tsp salt. Rest for 10 mins before serve.


2. In a pot of boiling water, put in the dry egg noodles. Once the dry noodles breaks open scoop up noodles in a strainer and let the noodle run under cold water. Put the noodles back into the boiling water and after 3 minutes, scoop the noodles up to serving platter.


3. Mix in the Ginger scallion sauce and toss together till well blended. I added 1tsp of oyster sauce on the noodles for additional taste.

4. Add in the pickled cucumber and we are in momofuku business :)


Verdict : Momofuku's ginger scallion noodles are famous for a reason and I guess it's because it taste real good. My Hubby-D gave his 2 thumbs up and look at how fast he slurpped the noodles up.


Friday, July 2, 2010

Momofuku's Ginger Scallion Sauce


I was looking thru my husband's iPhone one day.... No no not what you are thinking. I was not checking up on my man, I was checking out his new iPhone games :). Now where was I? As I was saying, I was looking thru his iPhone games and kinda diverted to look at his notes application, I saw this recipe for Ginger Scallion Sauce. Hmmm, a recipe in my hubby's phone??

Me : Dar, what is this Ginger scallion sauce recipe??
From the bathroom, he mumbled something like : "Momofuku, saw it on TV blah blah..."
Me : What? Mo....mofuku???, Don't joke, what you talking about?
He : Yeah Momofuku. Momofuku. Have u not heard of Momofuku?
Me : Stop kidding around. Nope. whatever....

I gave up. I thot my husband was joking around and gave me some Japanese superhero toy's name or whatever.

The thing is that I really have not heard of Momofuku or Ginger Scallion Sauce. I decided to ignore my husband and check out ginger scallion sauce on google and of course I found out that more often than not the Momofuku word would appear alongside.


Alright, Momofuku is a string of award winning restaurants in NY by Chef David Chang. Most popular is the Momofuku Noodle Bar. Momofuku means lucky peach and their menu apparently changes daily. Ginger scallion sauce is one of the sauces/condiments served in their restaurant.

Btw, if googling them is not enough, I even read the Momofuku Cook book. :) Alrite, enuff said. Let's get to the recipe of the famous Ginger Scallion Sauce. I modified the recipe slightly and it turned out pretty well so it's good to go! :)


Simple ingredients :

1. 2 cups of thinly sliced scallion (greens and whites ;2 large bunches)
2. 3/4 cup finely minced peeled fresh ginger
3. 1/4 cup grapeseed or other neutral oil
4. 2 teaspoons usukuchi (light soy sauce)- I used light soy sauce
5. 1 teaspoon sherry vinegar - I used Chinese rice wine
6 3/4 teaspoon kosher salt, or more to taste
7. 1/2 tsp of sesame oil - not on momofuku recipe ; I added this
8. 1-2 cloves of garlic - chopped finely - not on momofuku recipe ; I added this


Simple steps (This is how I made it modified from Momofuku's recipe)

1. In a pan, heat oil and add in the minced garlic. Stir fry till fragrant.

2. Add in the minced ginger into oil and let the ginger sizzle with the oil for 1 minute.

3. Pour the hot oil and ginger into the bowl of scallions.

4. Add in the seasoning of light soy sauce, rice wine, sesame salt and kosher salt.

5. Let it sit for at least 15 minutes before serving.


This is how momofuku's way of making it :

Mix together the scallions, ginger, oil, soy, vinegar, and salt in a bowl. Taste and check for salt, adding more if needed. Though it's best after 15 or 20 minutes of sitting, ginger scallion sauce is good from the minute it's stirred together up to a day or two in the fridge. Use as directed, or apply as needed.

I guess both ways are fine but I just wanted to bring down the rawness of ginger by blending it with some hot oil. I think it brings out the fragrance of the ginger and scallion better too. So how do we eat this delicious ginger scallion sauce?

Here is what Momofuku says :

Ginger scallion sauce is one of the greatest sauces or condiments ever. Ever. It's definitely a mother sauce at Momofuku, something that we use over and over and over again. If you have ginger scallion sauce in the fridge, you will never go hungry: stir 6 tablespoons into a bowl of hot noodles—lo mein, rice noodles, Shanghai thick noodles—and you're in business. Or serve over a bowl of rice topped with a fried egg. Or with grilled meat or any kind of seafood. Or almost anything.


I made their famous ginger scallion noodles. Details in next posting. :)


Related Posts with Thumbnails